SETUP GUIDE
1 - Navigating To The SHOGUN Configuration Page
http://<device_ip>:48880
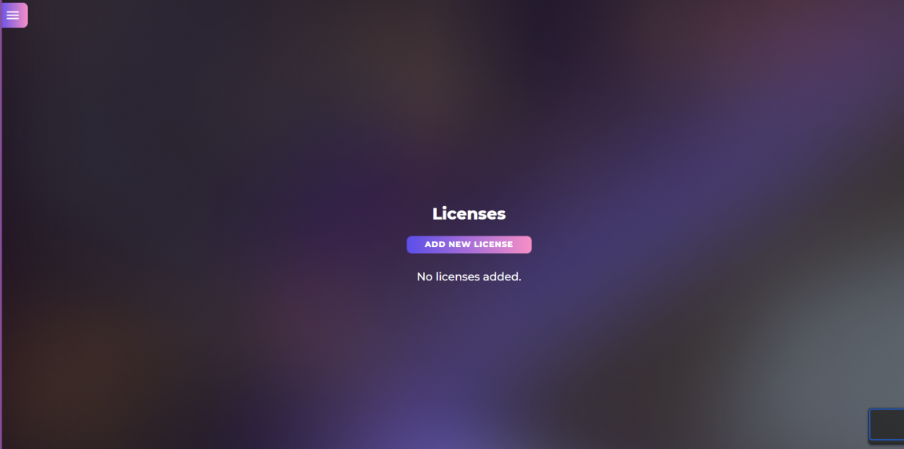
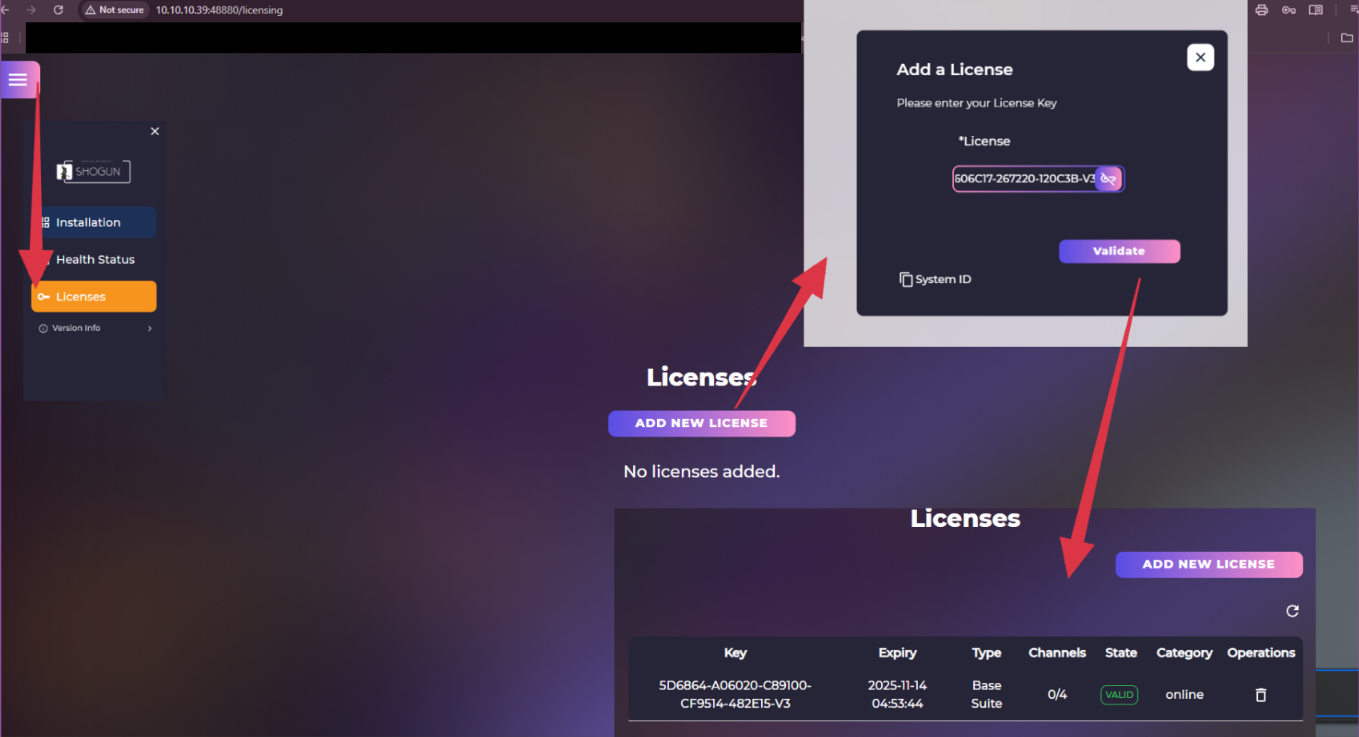
2 - Adding/Activating licenses
- Click the hamburger menu (☰) in the top-left corner of the page.
- Select Licenses from the menu.
- Click Add New License.
🔑 Adding / Activating a License (Online Method)
- Click Add New License.
- A License Validation popup will appear.
- Enter your License Key into the field.
- Click Validate.
🔒 Offline Activation (No Internet Access)
- In the License popup, click the copy icon next to System ID to copy it.
- Send the System ID to Art of Logic at 📧 sales@artoflogic.ai to request an offline license file.
- Once you receive the offline license file:
- Click the key icon.

- Select the license file you received.
- Click Validate.
- Click the key icon.
3 - Navigating And Using The Installation Interface
To access the installation page:
- Click the hamburger menu (☰) located in the top-left corner of the webpage.
- From the menu, select Installation.
Once on the Installation page click on the Camera section which will open the NX VMS Settings tab.
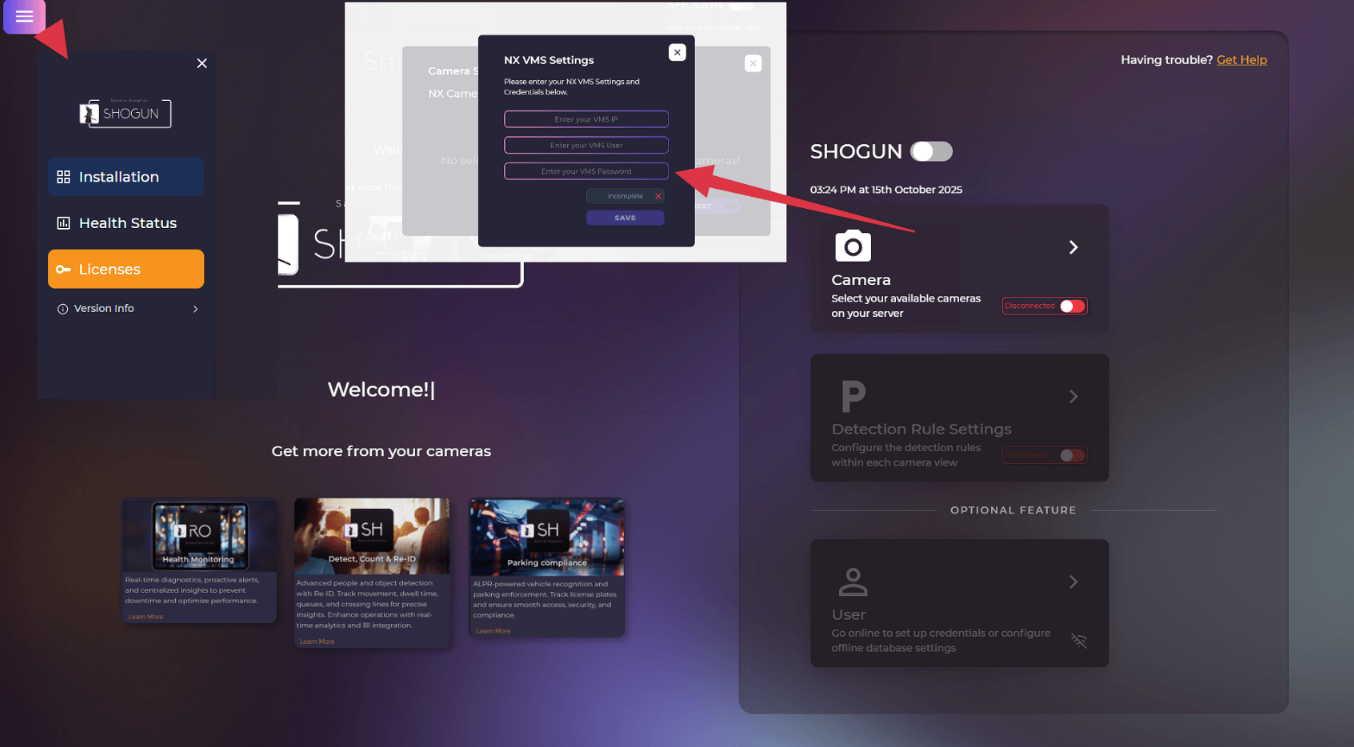
Connecting SHOGUN To Nx VMS
To connect SHOGUN to your Nx VMS:
- Enter your Nx user credentials.
- The user must have at least Power User privileges.
- Digest Authentication must be enabled for this user in Nx.
- After entering valid credentials, click Connect (or the equivalent button).
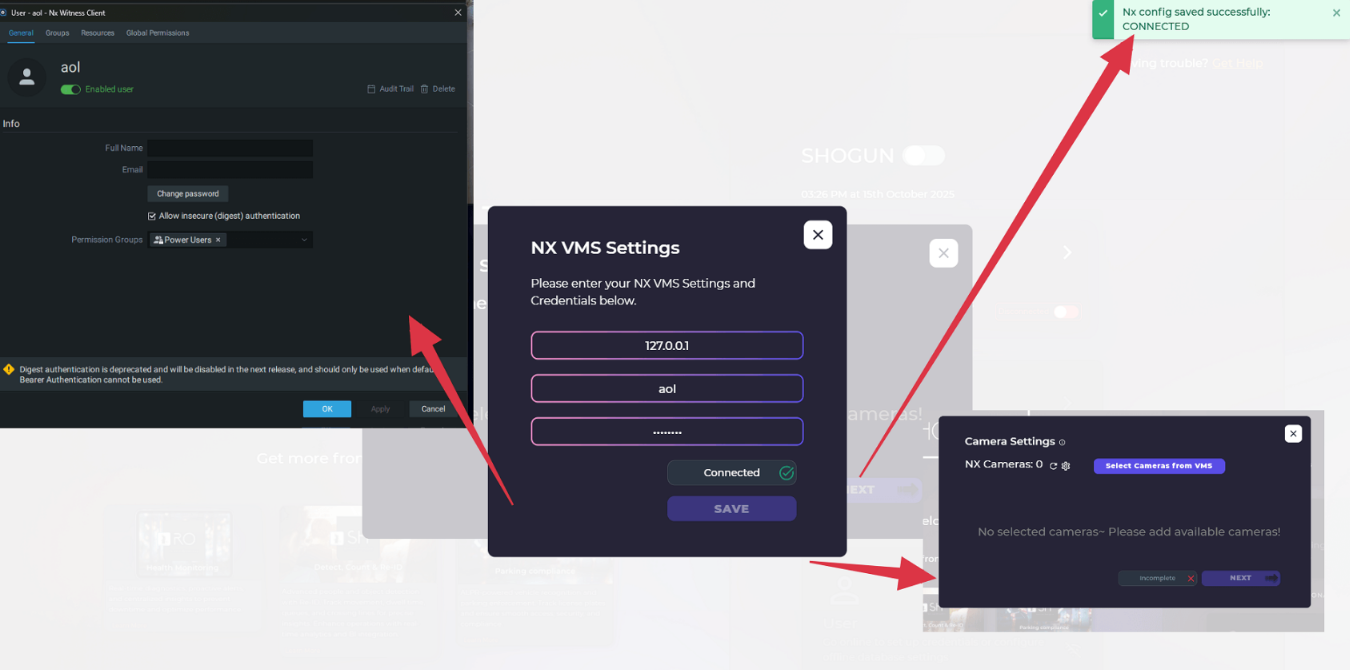
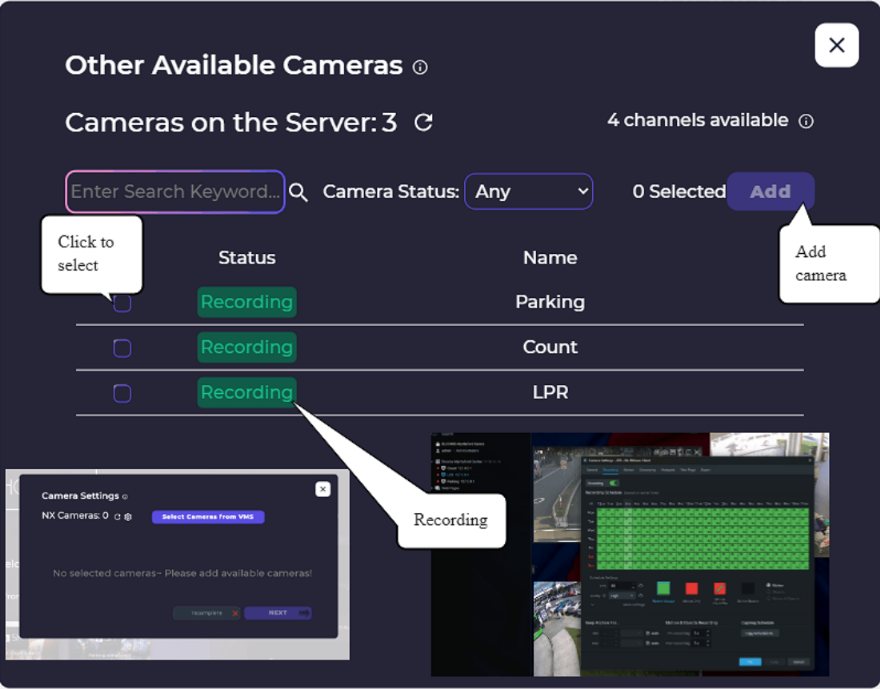
Selecting Cameras From Nx VMS
To select cameras from the Nx VMS:
- Click Select Cameras from VMS. A list of all cameras connected to the Nx server will appear.
- Select the cameras you want to run analytics on.
- Click Add to confirm your selection.
- Click X to go back to Camera Settings tab once you have added all the cameras you need.
- Click next to go to the analytic setup page.
4 - Setting Up Analytic Rules For Each Camera
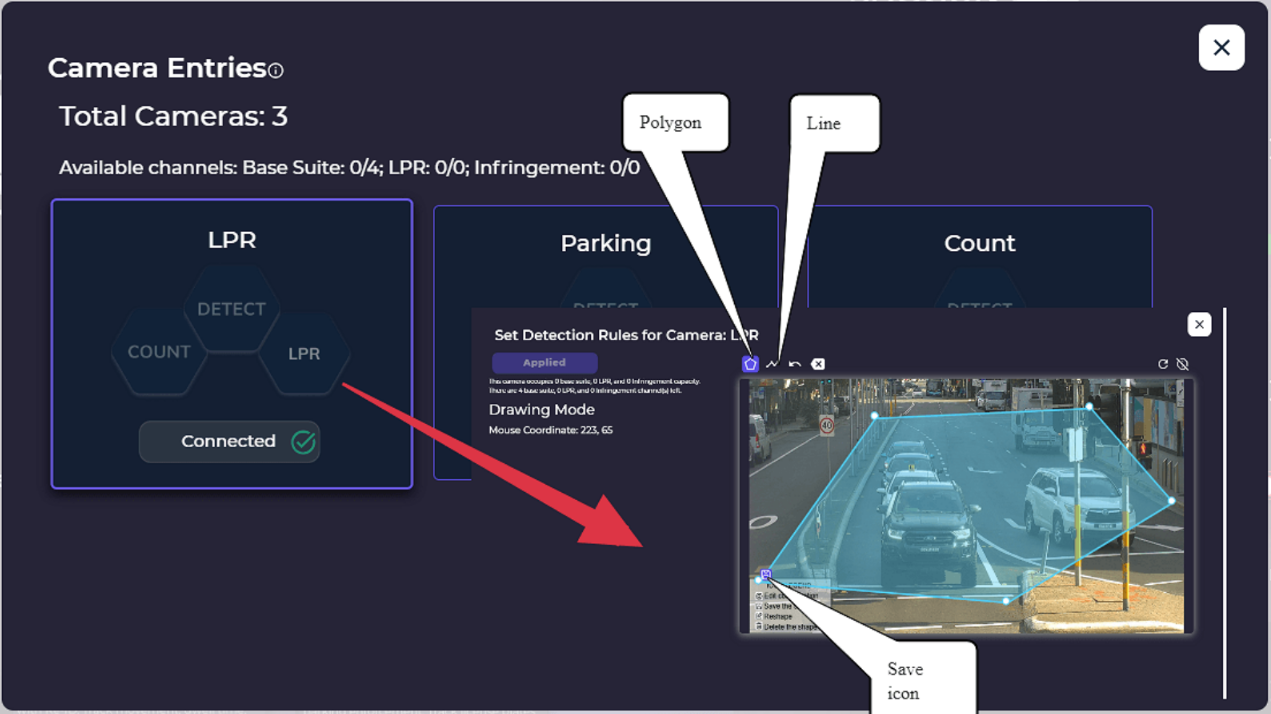
Drawing The Analytic Region/Line
- After adding cameras, select a camera from the list to configure analytics.
- Choose the type of rule area you want to create:
- Line
- Polygon (zone/area)
- Draw the line or polygon on the video preview where you want the analytics to apply.
- Once you finish drawing, click the Save icon to store the rule.
Choosing An Analytic Type For A Line Or Polygon
After you have saved your line or polygon you will see the following window pop up:
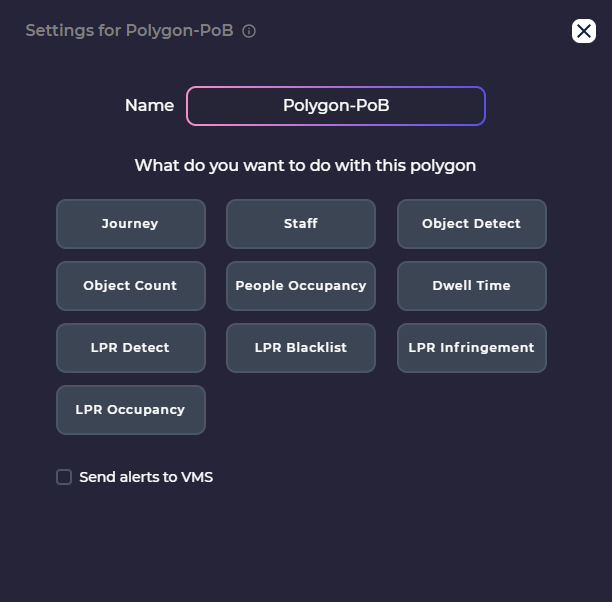
This window displays all the types of analytics that you can setup on this camera. If you drew a line then some of the options will be greyed out as they are not compatible with a line.
In the name field you can assign a name for the polygon or line.
After that you will need to pick and setup an analytic type. The guides for each analytic are listed below:
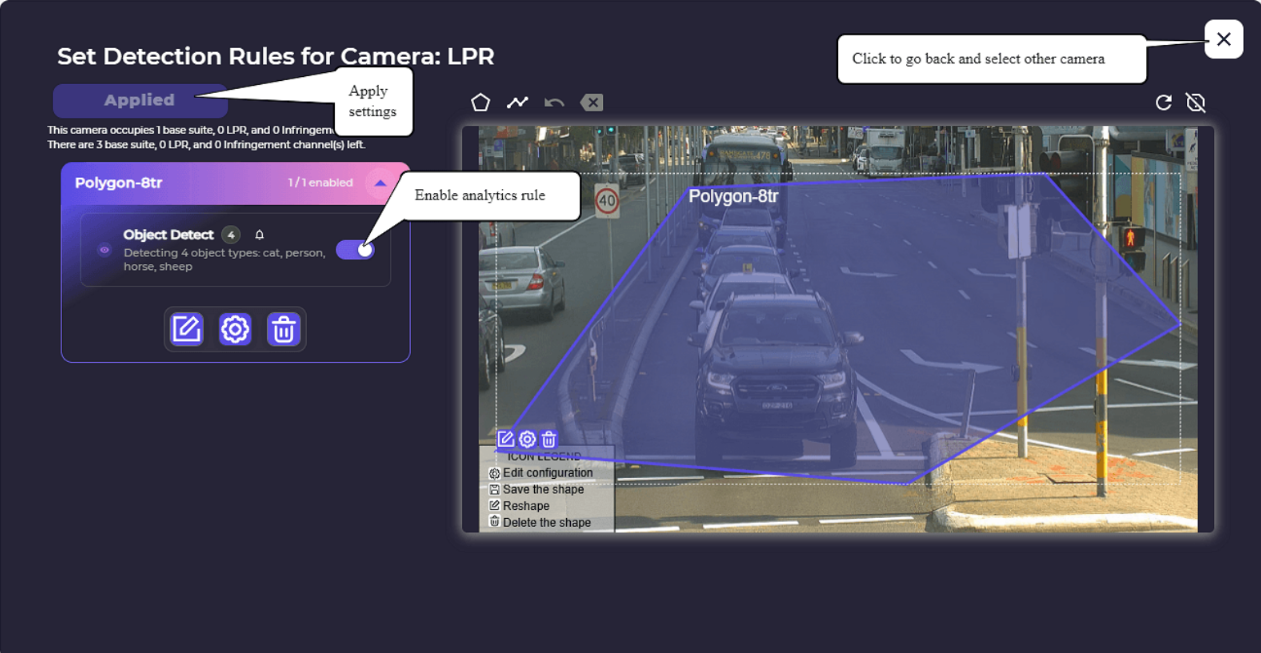
Enable Analytics
Once you have created your analytic rules you will need to enable them.
To do this just click on the toggle button next to each of the analytic rules you wish to enable and then click on the Apply button.
Then click on the X button to exit the current cameras configuration page which will take you back to the list of cameras. From here you can continue to setup analytics on the remaining cameras.
Once you are done creating all the analytic rules for your cameras click on the X button to return to the Installation page.
5 - Setting Up User And Database Settings
To configure the User settings click on the User section. This will open the User and Database settings popup menu.
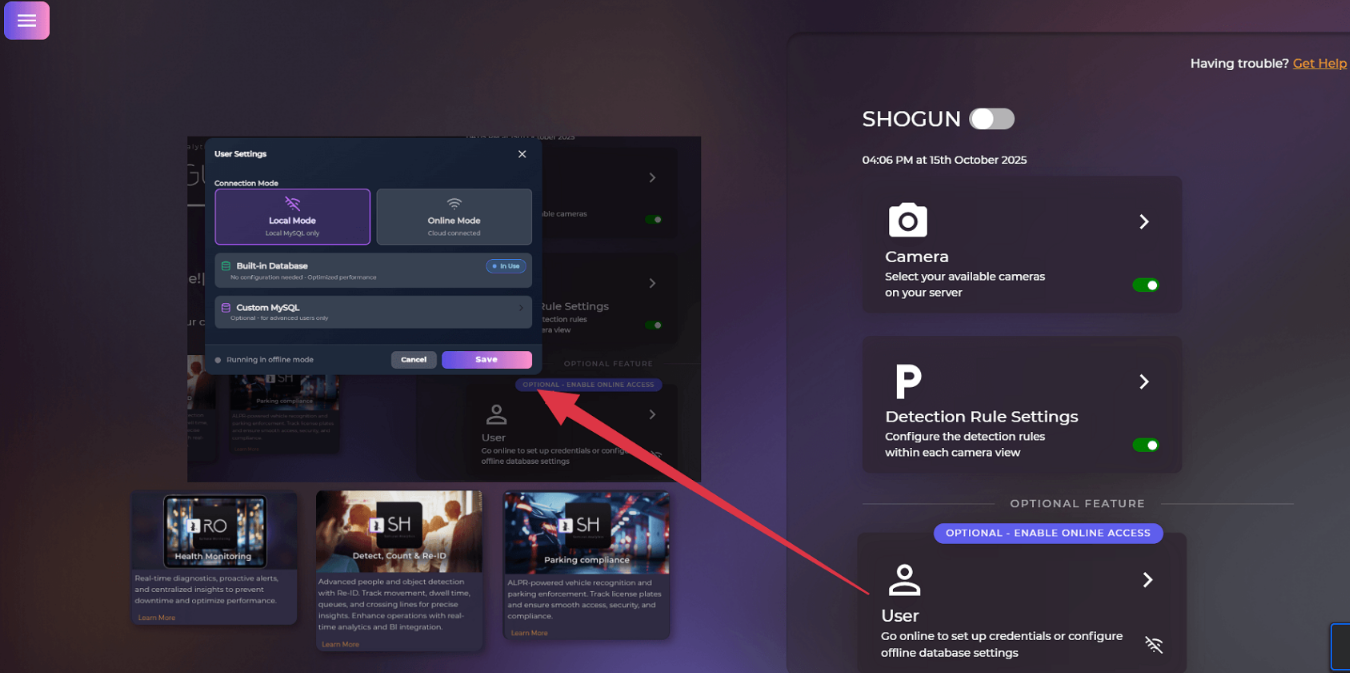
Within this settings menu there are three main options for configuration, these being Local Mode with a built-in Database, Local Mode with a custom database and Online Mode.
Local Mode With A Built-in Database
To set up local mode (offline mode) with AOL's built-in MySQL database:
- Click on Local Mode
- Click on Save
- Close the settings menu
Local Mode With a Custom MySQL Database
If you have your own custom MySQL database that you would like to use you will need the following information:
You will need to have an account with read and write access to the database. For this account you will need to provide the host ip, port number (3306), the username and password. Once you have this information you can connect the database to SHOGUN by:
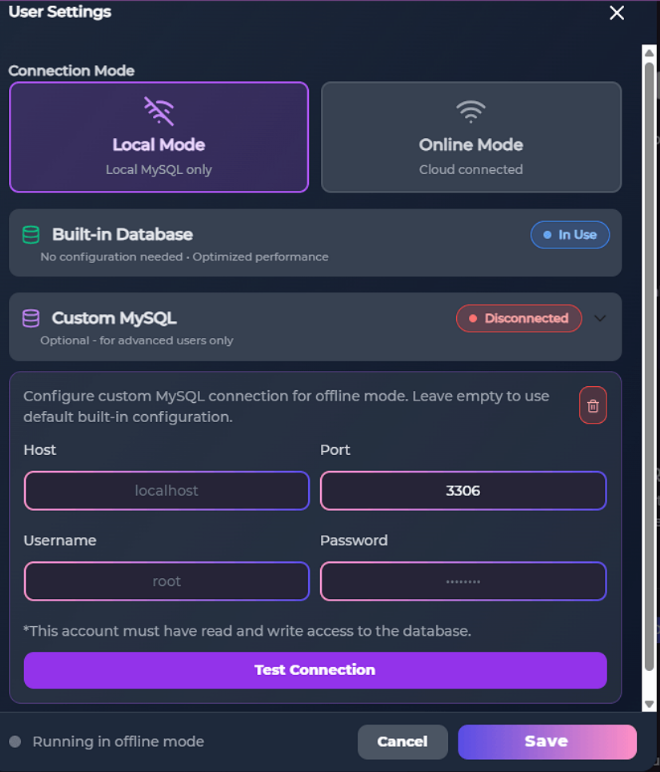
- Click on Local Mode
- Click on the Custom MySQL drop down menu
- Enter in the account details as mentioned above
- Click Test Connection to test if SHOGUN can connect to the database
- If the connection was successful then click Save
- Close the settings menu
Online Mode
To use AOL's online database you will need to have the following:
- The device will need a continuous internet connection
- An insights/ronin account (to see how to setup an insights account, see the following guide; 📄 Insights Portal Sign Up)
- A business token (to see how to obtain a business token, see the following guide; 📄 Navigating The Insights Portal)
Once you have all of the above you can set up online mode by:
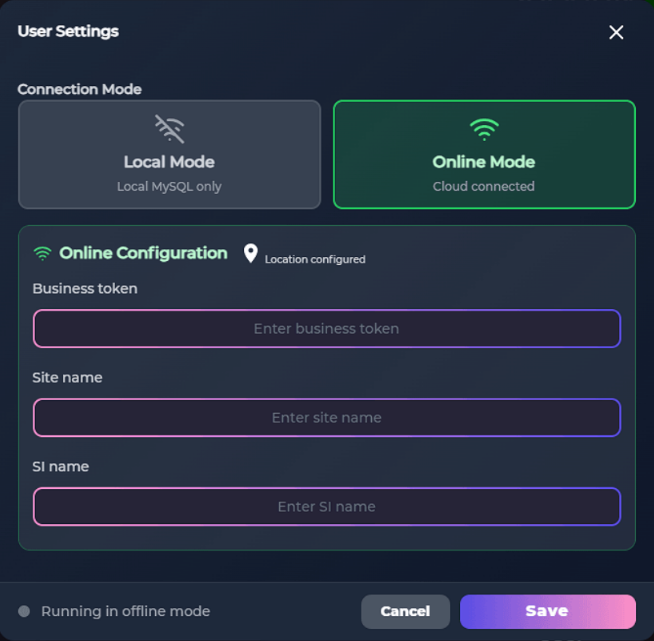
- Click Online Mode
- Click on the location pin icon which will open a pop up tab where you can configure your devices location by either;
- Entering the longitude and latitude coordinates
- Dragging the pin on the map to the correct location
- Enter in the business token, site name, and the SI name (could be yourself)
- Click on Save
- Close the settings menu
Having Online Mode enabled will allow you to view the analytics data at: insights.artoflogic.ai and it will allow you to view your systems health data at: ronin.artoflogic.ai if it has ronin licenses attached.
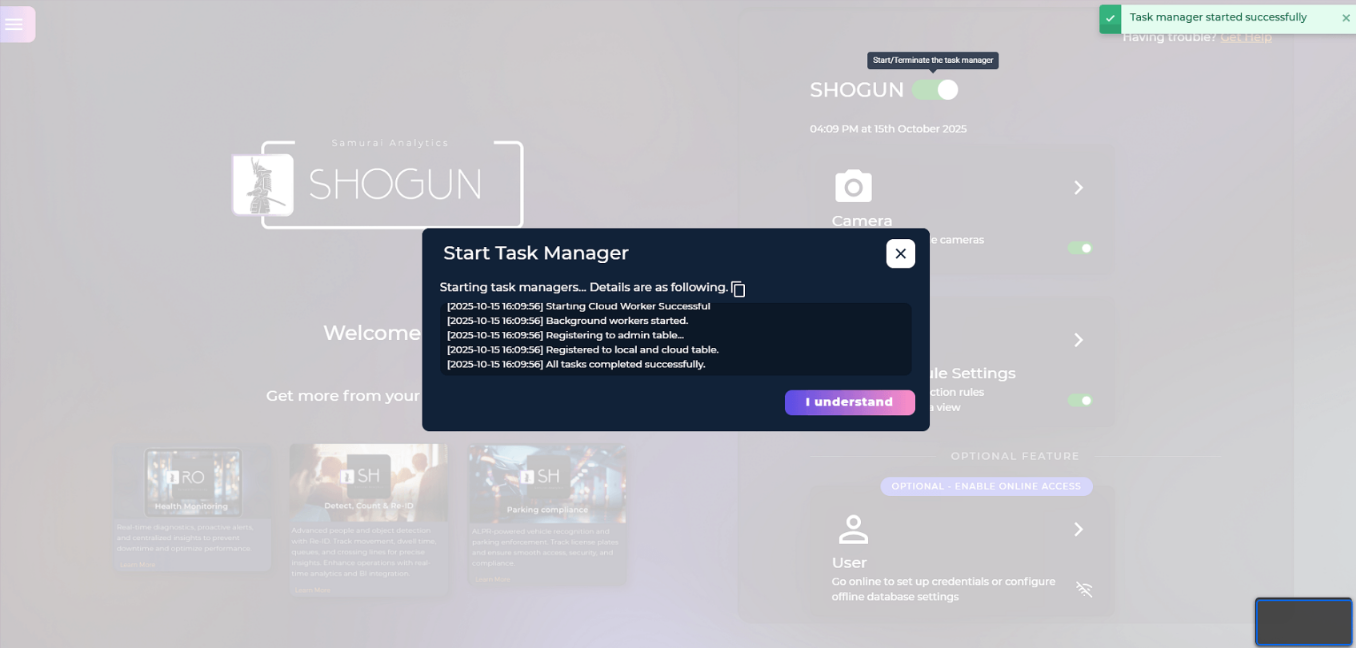
6 - Enabling SHOGUN Analytics
To enable SHOGUN analytics:
- Click the toggle button next to SHOGUN at the top right of the screen
- Upon successful activation you will see the following:
- A green success message pop up at the top-right of the webpage
- A task manager pop up indicating that the task has started successfully
- Once you have seen those two things you can close the task manager status pop up
7 - Contacting Support
If you are encountering any issues with any of the above steps, please contact Art of Logic support at 📧 support@artoflogic.ai